TileSurgeon User Manual
Generate seamless terrain border / autotile blends and road & river corridor overlays for square, isometric, and hex maps — then export full variant sets ready for your engine.
1. What TileSurgeon is for
TileSurgeon is a specialized tile / border maker — not a full map editor. You bring biome textures (grass, sand, rock…) or path materials, and the app builds the transition tiles that make those materials meet cleanly on a grid.
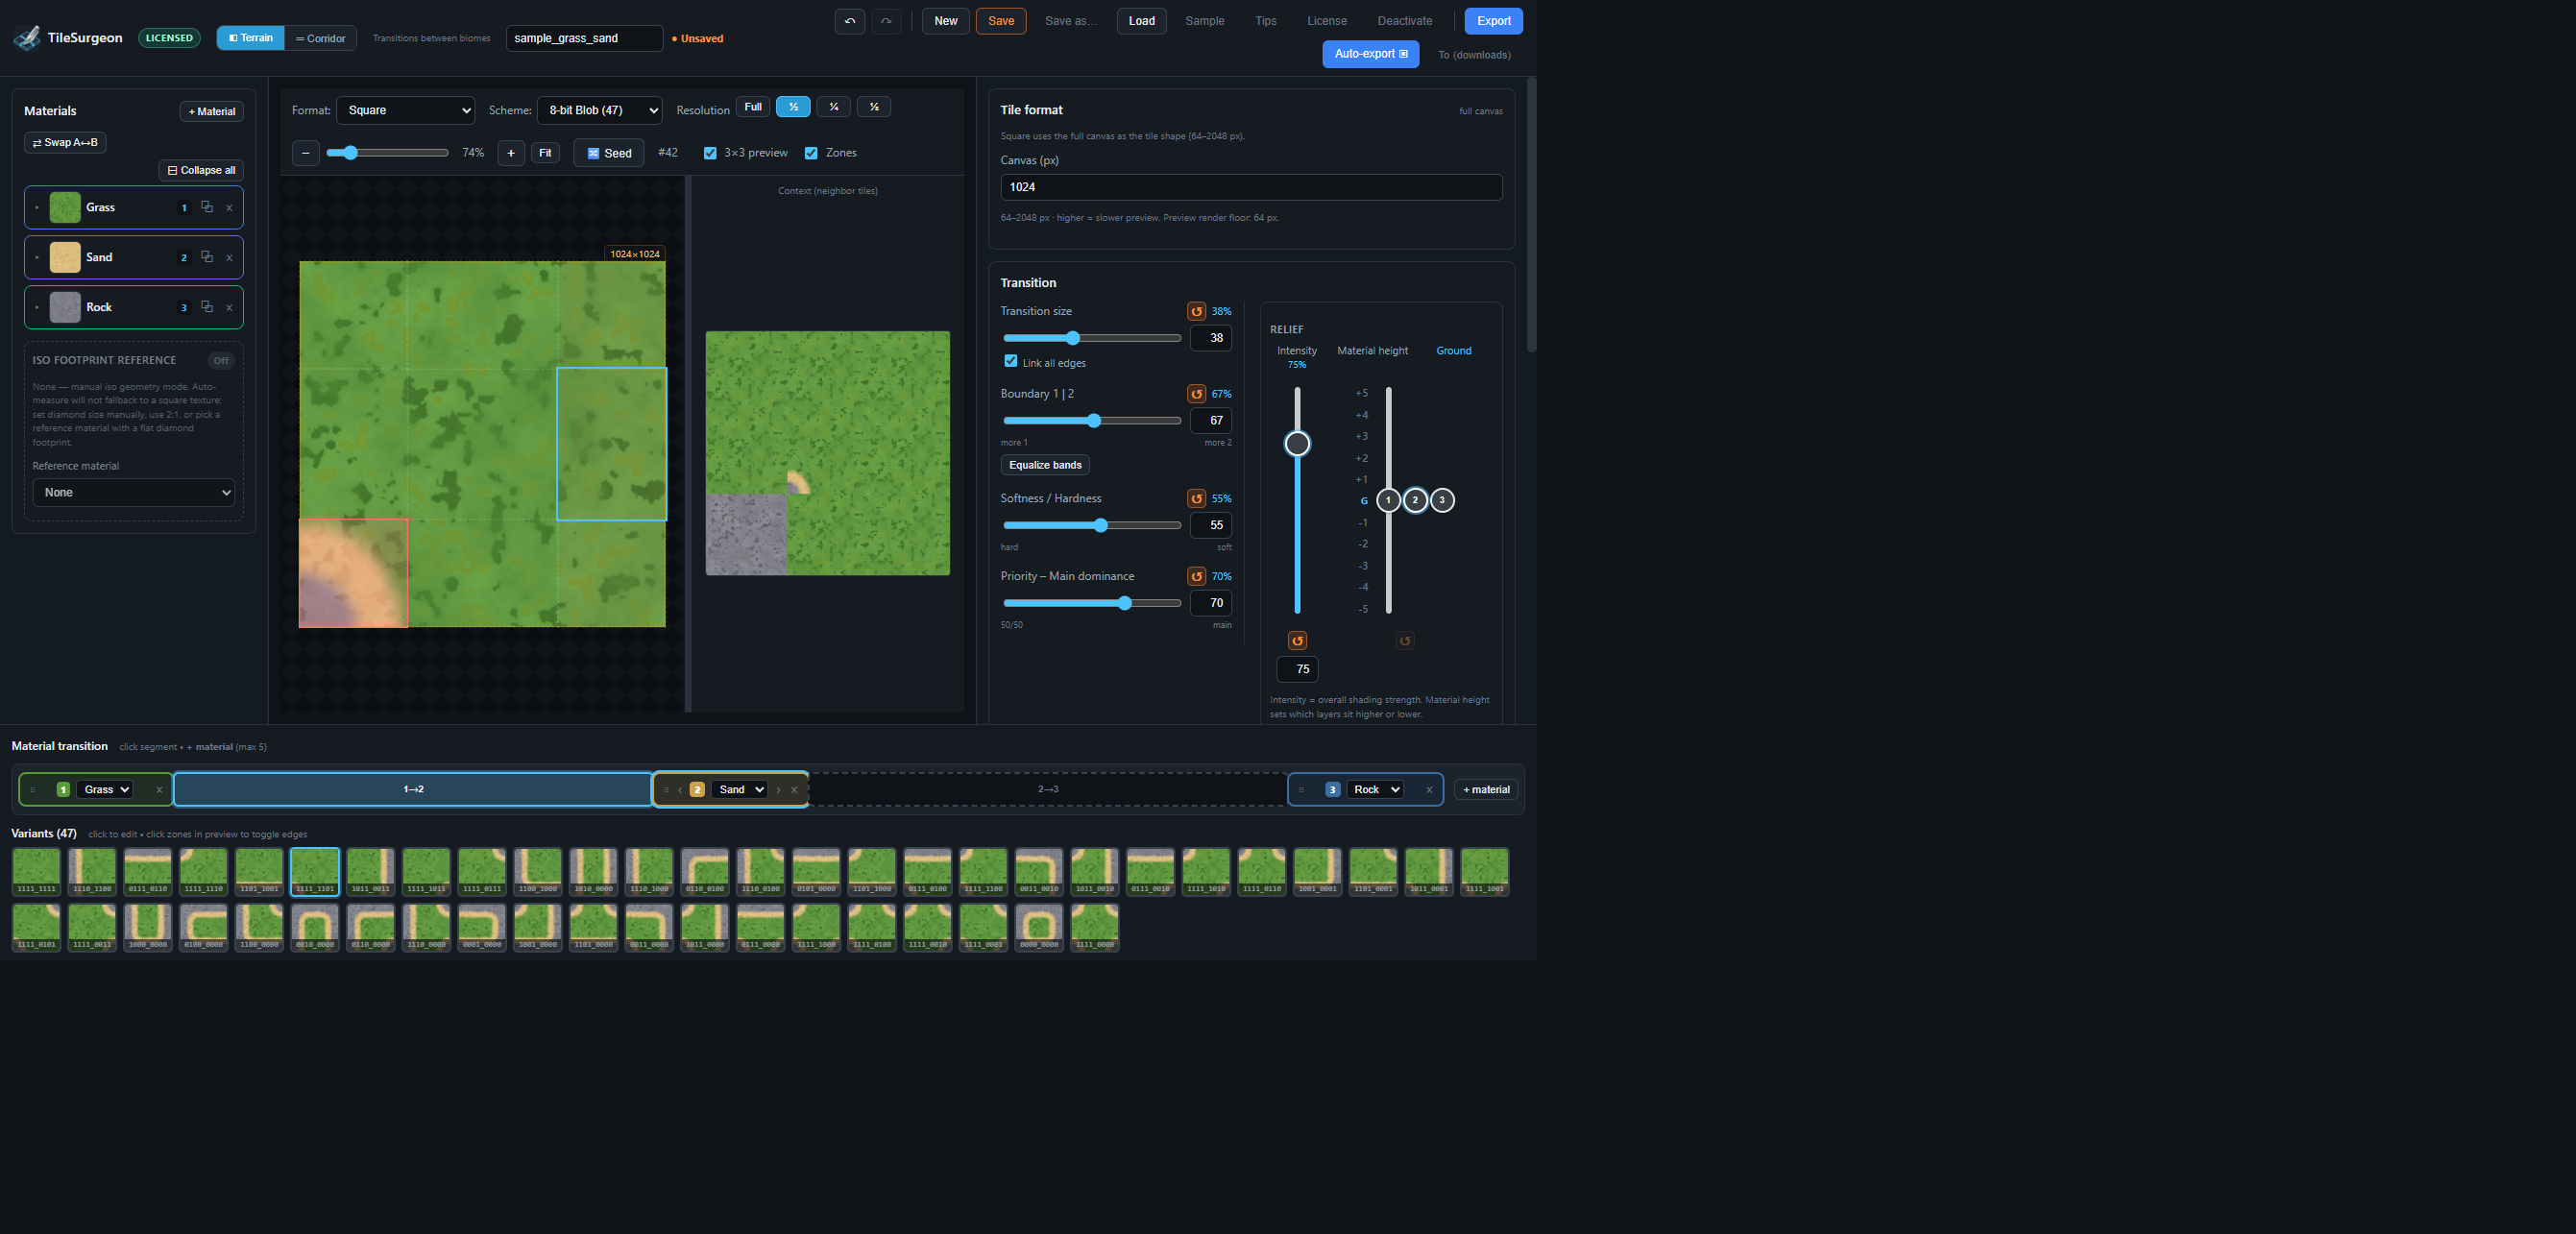
- Terrain mode — blends between biomes (e.g. grass → sand) into an autotile set (Blob 47, edge 16, Wang 16, or hex edges).
- Corridor mode — builds roads / rivers / paths as an alpha overlay (transparent outside the path), optionally composited over a terrain base for preview or export.
- Formats — Square, Isometric (diamond), Hex (pointy or flat).
- Output — PNG or WebP textures, optional black/white masks, single variant or full Auto-export set.
2. Disclaimer & important limits
TileSurgeon helps you generate tile assets from materials you provide. It does not grant rights to third-party textures, nor does it replace your game’s autotile / rendering pipeline. Always keep backups of projects and source art.
- Your content stays yours. Exported tiles and project files you create remain your property. You are responsible for the legality of imported images.
- Trial vs licensed. Without activation, previews may show a watermark and Export, Auto-export, and project Save stay locked. See the in-app EULA for full terms.
- Not a map editor. You do not paint a world here — you author reusable tile sets that fit together when placed by your engine or tilemap tool.
- Results depend on inputs. Softness, noise, relief, and texture scale interact. Two good textures can still need tuning; use Seed and Resolution presets while iterating.
- Legal. Official license terms: in-app License → EULA, or
EULA.md/ product page. This manual is documentation only and does not modify the EULA.
3. Quick start (5 minutes)
- Click Sample in the top bar to load Grass → Sand (or follow Tips on first launch).
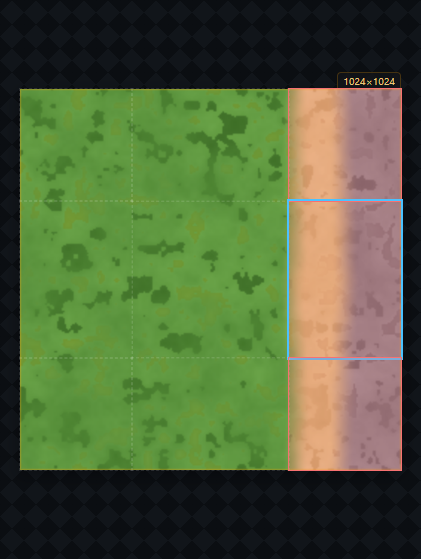
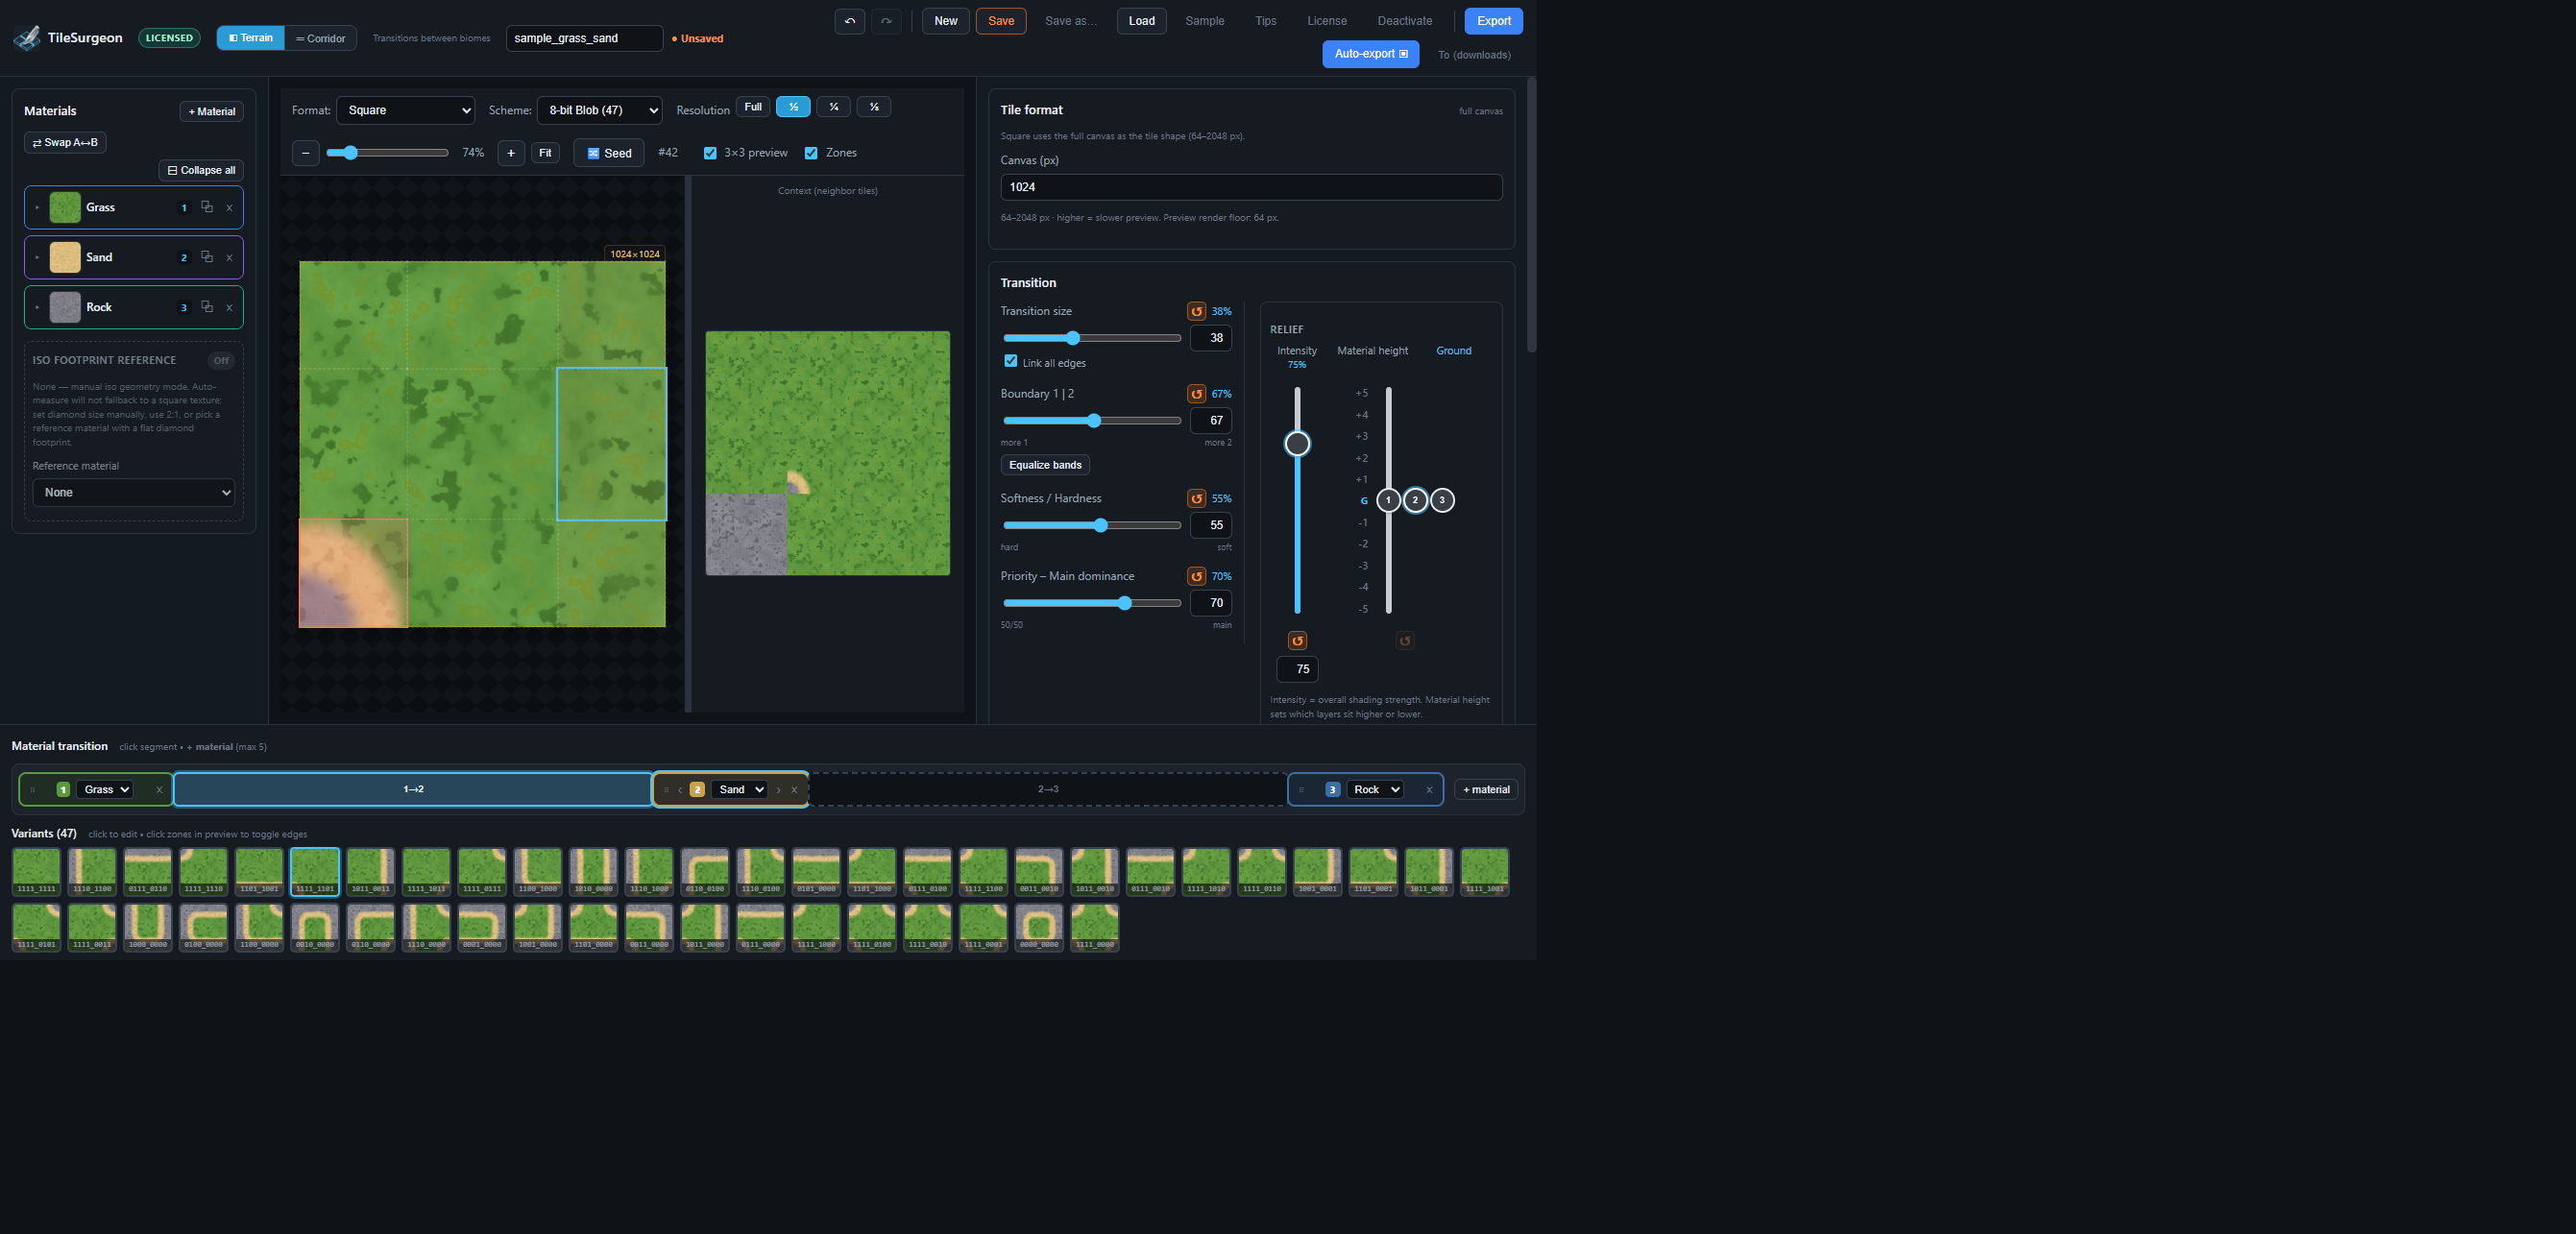
- In the center preview, click the zone wedges (N / E / S / W on square) to change which edges carry the secondary material.
- Click a thumbnail in the bottom Variants strip to jump between Blob shapes.
- On the right, nudge Transition size, Softness, and Blend mode until the edge looks natural.
- Press Space (Seed) to randomize texture placement / noise variants.
- Set Export size and base name on the right, choose a folder with To …, then Export (current) or Auto-export ▣ (full set). Requires a license.
4. UI overview

| Region | Role |
|---|---|
| Top bar | Mode switch, project I/O, license, export actions |
| Left panel | Create / edit materials and textures |
| Center | Inspect one tile + neighbors; toggle edge zones |
| Right panel | Geometry, blend parameters, export naming & size |
| Bottom bar | Stack order (which materials blend) + all scheme variants |
5. Terrain vs Corridor
Use the Terrain / Corridor buttons in the top bar. Each mode keeps its own material library and stack — switching modes does not overwrite the other.
Terrain
- Goal: biome-to-biome transitions that tile with neighbors (classic autotile sets).
- Hint text: “Transitions between biomes”.
- Typical stack: material 1 (main / A) → material 2 (secondary / B), up to 5 layers.
- Right panel shows Transition (size, softness, blend, relief, stroke).
Corridor
- Goal: roads, rivers, paths as an overlay with transparent outside (unless you export with terrain base).
- Hint text: “Roads and rivers (alpha overlay)”.
- Left panel shows Overlay — exported layers plus optional Preview base (3×3) (editor-only — not part of the overlay export stack).
- Right panel shows Road / River: overall width, export base, outer fade, edge noise, relief, and 1→2 material transition.
- Scheme becomes corridor variants (e.g. 16 for square).
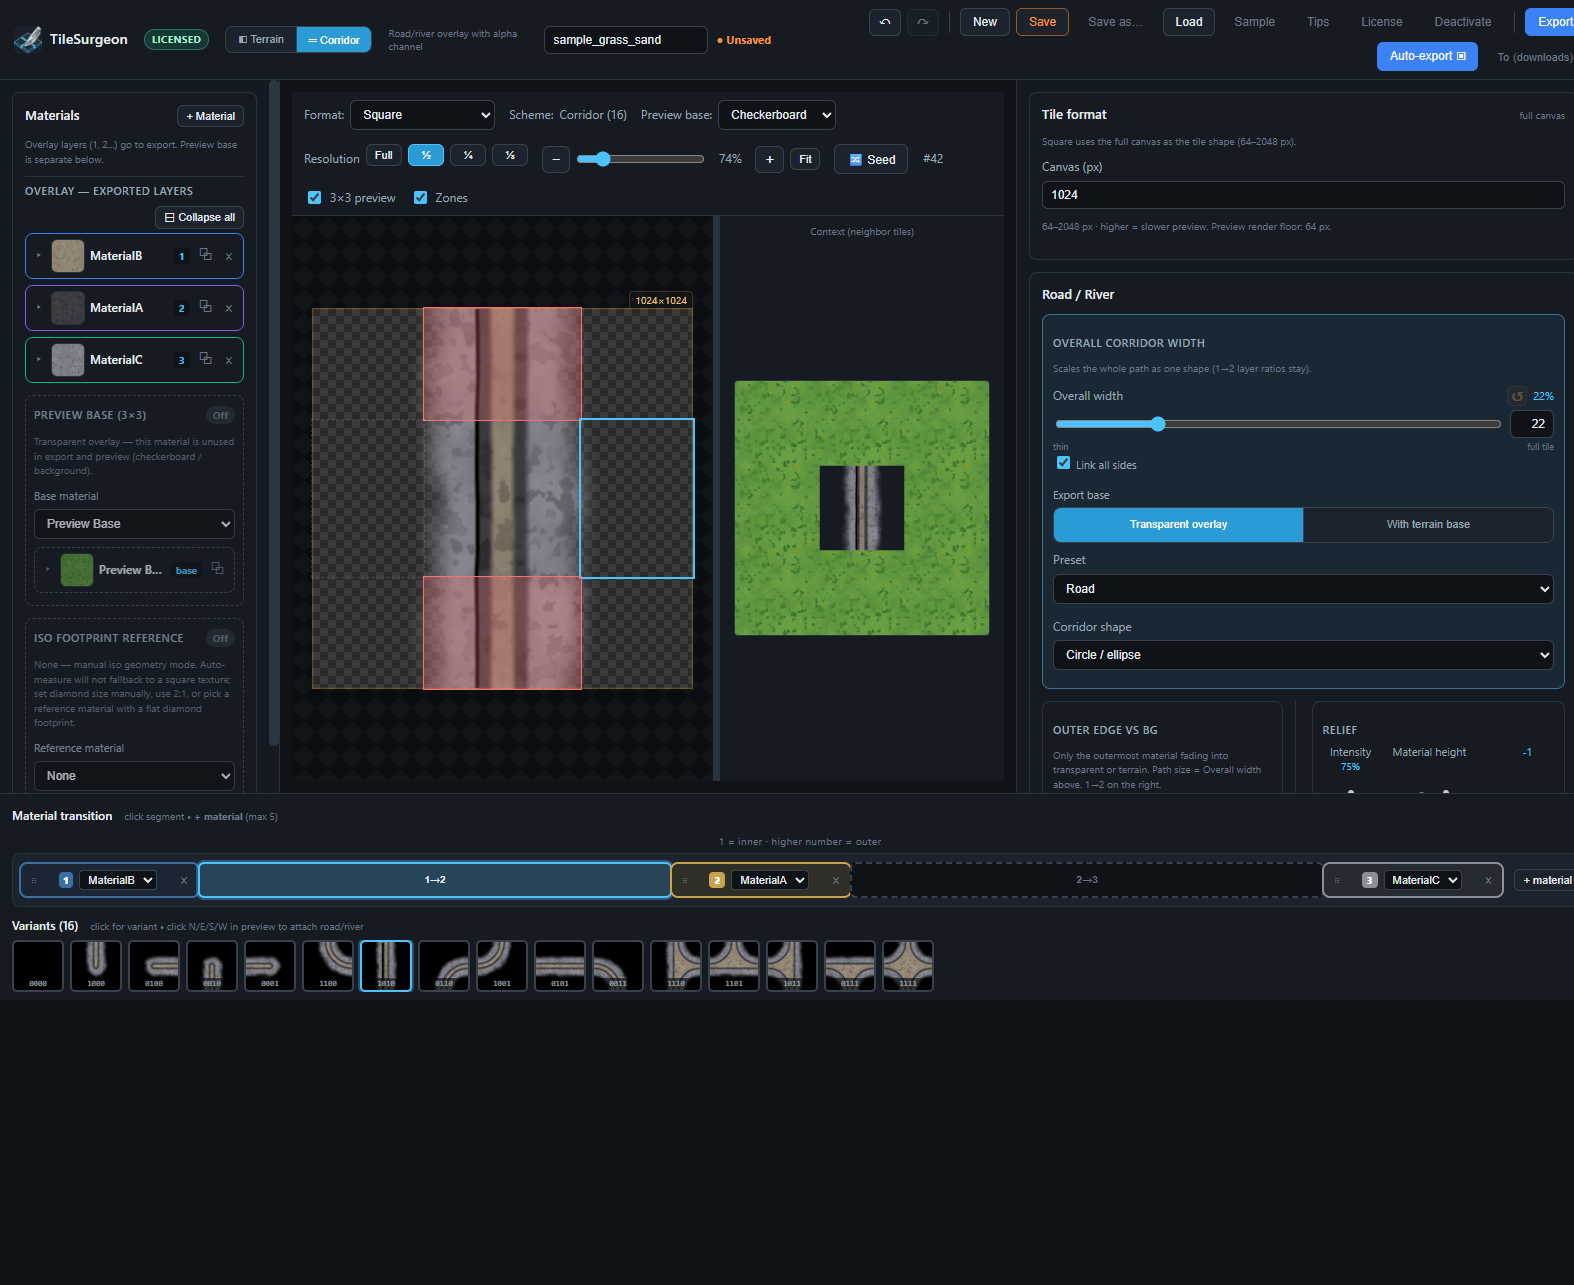
Terrain fills the tile with biomes meeting along a mask. Corridor paints a path body on top of transparency (or a terrain underlay), with outer fade controlling how the outermost material dissolves into the background.
6. Materials — add, edit, organize
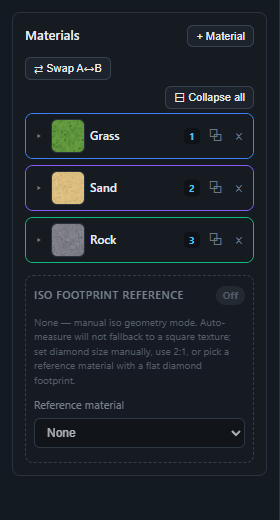
Materials live in the left panel. They are the texture sources the mask samples into. A material can hold several tile images; on export / seed, TileSurgeon picks among them for variation.
Adding materials
- + Material (left panel) — creates a new material card in the library.
- + material (bottom stack) — inserts a layer into the active transition (max 5).
- Drop or click the dashed zone to add PNGs; or use the placeholder dropdown (grass, sand, rock…) and + Add.
Editing a material
Click the summary row (or ▸) to expand. Common controls:
| Control | Effect |
|---|---|
| Name / duplicate / remove | Identify, clone, or delete the material |
| Stroke Only export | Special export mode: each tile as its own file for stroke workflows |
| Drop PNG / placeholders | Source textures for this material |
| Scale / Rotation | How the texture is sampled into the mask |
| Texture color presets + H/S/B/C | Quick grade without leaving the app |
| Visibility | Layer opacity contribution |
| Layer height | Feeds relief / emboss ordering (also editable on the height ladder) |
Terrain helpers
- ⇄ Swap A↔B — swaps main and secondary materials in the pair.
- ⊟ Collapse all — collapses material cards for a cleaner list.
- Iso footprint reference — optional: pick a stack material whose first tile defines the isometric diamond. None = manual geometry (set shape size / 2:1 / Measure yourself).
Corridor helpers
- Preview base (3×3) — biome underlay for the editor only. Status badge shows On/Off. Not exported as part of the overlay stack.
- Overlay materials are the layers that do go into corridor export.
7. Center workspace — preview, zones, context
Toolbar
- Format — Square / Isometric / Hex.
- Scheme — Blob 47, 4-bit edge (16), Wang corner (16). Hex locks to hex edges (64).
- Preview base (corridor) — Checkerboard or simulated biome.
- Resolution — Full / ½ / ¼ / ⅛ for live preview cost only.
- Zoom — 10%–400%, Fit.
- Seed — randomize texture variants (Space).
- 3×3 preview — show neighbor context pane.
- Zones — show / hide clickable edge overlays.
Zones
Click zones around the center tile to toggle which neighbor edges are “on” for the active variant shape.
- Square — N / E / S / W (and diagonals in the 3×3 grid UI).
- Isometric — diamond wedges.
- Hex — edge slots H0–H5.
The right-hand Context (neighbor tiles) pane shows how the current tile sits among neighbors — useful before export.
8. Right panel — format, transition, corridor, export
The right column is the main parameter surface. Contents change with mode and format.
Tile format
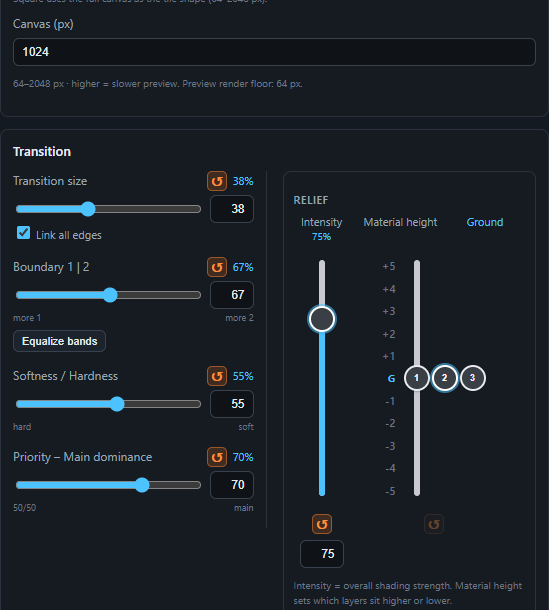
- Canvas (px) — shared working size, 64–2048. Higher = slower live preview.
- Square — full canvas is the tile.
- Isometric — Shape width / height, Center Y, 2:1 preset, Measure from tile, Auto-measure on upload, optional Decorative overhang (terrain iso — outer décor may draw past the diamond).
- Hex — orientation (pointy / flat); scheme switches to hex edges automatically.
Transition (Terrain)
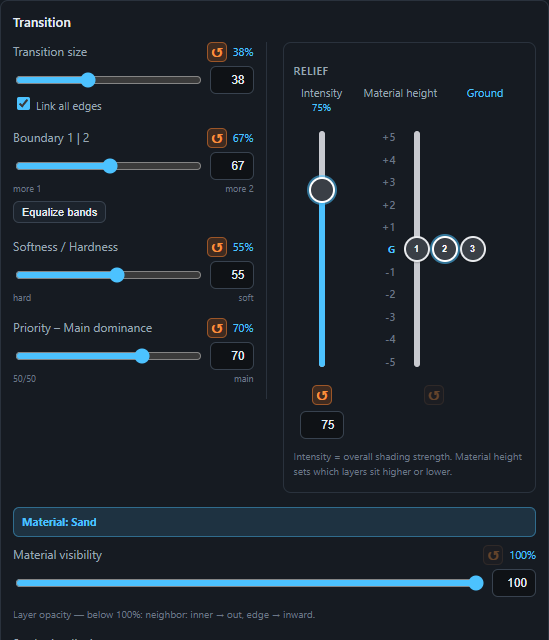
- Transition size — how far the blend reaches into the tile. Link all edges or edit N/E/S/W (or hex H0–H5) independently; Copy / Paste edge.
- Transition range — with 2 materials = blend width around center; with more = band boundary position. Equalize bands when available.
- Softness / Hardness — soft ramps may slightly overhang into neighbor bands (needed for thin soft strips).
- Priority – Main dominance — bias toward the main material.
- Relief — Intensity + Material height ladder (drag numbered knobs; G = ground). Same height → knobs sit side by side.
- Blend mode / Mask shape / Noise — see Blending.
- Stroke (outline) — optional colored outline thickness.
Road / River (Corridor)
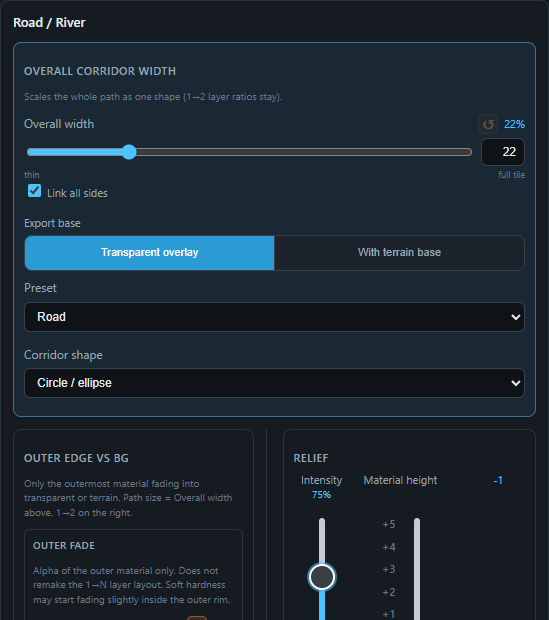
| Area | What it controls |
|---|---|
| Overall width | Scales the whole path body (1→N layout ratios stay). Link all sides optional. |
| Export base | Transparent overlay vs With terrain base in export. |
| Preset / shape | Road, Path, River, Custom · Circle/ellipse or Square/rectangle. |
| Outer edge vs BG | Outer fade width & hardness — only outermost material ↔ transparent/terrain. Does not move 1→2 bands. |
| Edge blend / noise | Gradient / Noise / Mixed jaggedness on the outer rim. |
| Relief | Intensity + material heights (same idea as terrain). |
| Material transition | 1→2 (…→N) boundaries — also editable via the bottom stack segments. |
9. Blending, noise, and relief
Blend mode
- Gradient — smooth geometric falloff.
- Noise — organic irregular edge (noise scale / strength).
- Mixed — gradient + noise (default for natural biomes).
In corridor mode, Edge blend under Outer edge uses the same idea for the rim; noise sliders disable when Edge blend is Gradient-only.
Mask shape (terrain)
Square / rectangle vs Circle / ellipse changes the geometric falloff silhouette of the transition mask.
Relief
Relief (emboss) shades layers based on relative Material height. Raise a layer to catch more light / cast as “higher”; lower it into a depression. Intensity scales overall shading strength. Reset buttons restore defaults / all materials to Ground.
- Lock size & dominance first so the silhouette is right.
- Set Softness so the contact line isn’t a hard cut (unless you want that).
- Switch Mixed and raise Noise strength slightly for organic coasts / dirt edges.
- Offset heights (±1) and raise Intensity until depth reads without crushing texture.
- Seed a few times; pick the luckiest texture alignment.
10. Material transition stack (bottom bar)

- Order is 1 = inner, higher numbers = outer (corridor hint shows this explicitly).
- Click the 1→2 (or 2→3…) segment to focus that boundary — the right panel updates to that transition.
- Use dropdowns on each slot to pick which library material occupies that layer.
- + material adds a layer (max 5). Remove via the slot controls when available.
11. Variants (bottom previews)
The Variants strip lists every tile in the current scheme (e.g. 47 for Blob, 16 for edge/corridor, 64 for hex).
Click a thumbnail to make it active in the center preview. Codes under tiles (e.g. 1111_1101) encode neighbor / bitmask information used in naming when “Include bitmask code” is on.
- Terrain Blob 47 — full Wang-blob style neighbor set.
- Corridor — straights, corners, T-junctions, crosses, caps (scheme-dependent).
- In corridor, you can also click edges in the preview to attach road/river connectivity (see the variant hint).
12. Projects, autosave, and undo
- New / Save / Save as… / Load — JSON project files (licensed for Save).
- Sample — loads the Grass → Sand demo.
- Tips — reopens the 8-step first-run guide.
- Autosave — optional draft to the browser every 3 minutes when dirty (toggle in Export card). On relaunch you may be offered Restore.
- Unsaved badge — project has changes since last save.
13. Export settings and export
What to export
- Texture — color tiles.
- BW mask — black/white masks (separate size field when enabled).
- Both — textures and masks.
Size & format
- Presets are canvas × multiplier (¼× … 4×), clamped to 8–8192 px.
- Preview Resolution does not change export size.
- Formats: PNG or WebP.
Destination
- Choose folder… / top-bar To … — write tiles into a folder when the environment allows; otherwise downloads / ZIP.
- Project Save as… is separate from tile export destination.
Naming
- Base name, optional Prefix / Suffix.
- Include bitmask code — embeds neighbor codes in filenames (see live naming preview).
- Auto-export = all pairs — when Auto-exporting, emit all material pairs into folders.
Actions
| Action | Result |
|---|---|
| Export (Ctrl+E) | Exports the current active variant |
| Auto-export ▣ | Exports the full variant set (ZIP or folder). Progress bar + Cancel on long runs |
14. License & trial
- Open License to paste a key (Indie / Studio seats — see EULA).
- Trial: watermarked previews; Export / Auto-export / Save locked.
- Buy License opens the purchase flow when configured.
- Activating means you agree to the EULA (viewable from the license dialog).
Full legal text: in-app EULA viewer or product documentation. Contact: spritesurgeon@gmail.com.
15. Keyboard shortcuts
| Shortcut | Action |
|---|---|
| Ctrl+Z | Undo (params / transition / stack) |
| Ctrl+Y | Redo |
| Ctrl+S | Save project |
| Ctrl+E | Export current variant |
| Space | New Seed (randomize variants) |
16. FAQ & troubleshooting
Preview is slow
Lower preview Resolution (½ / ¼ / ⅛) or reduce Canvas while designing. Raise Canvas again before final export if you need more detail.
Iso diamond looks wrong
Set Iso footprint reference to a material whose first tile is a clean diamond footprint, or leave None and use Measure from tile / 2:1 / manual width & height. Enable Decorative overhang only when outer décor should extend past the diamond.
Corridor edge soft but bands jumped
Outer fade does not move 1→2 boundaries. Adjust Overall width for path size, Outer fade for rim alpha, and the right-column / bottom-bar Material transition for layer splits.
Preview base vanished on export
Expected — Preview base is editor-only. Use Export base With terrain base if you need underlay in the file.
Undo didn’t restore my texture
Material uploads and library edits are outside undo. Use duplicate materials before risky experiments.
Autosave vs Save
Browser autosave is a crash net, not a substitute for Save / Save as… to a real project file (licensed).
17. Glossary
| Term | Meaning |
|---|---|
| Autotile / Blob 47 | Set of tiles covering neighbor combinations so edges meet seamlessly |
| Wang / edge scheme | Smaller coded sets (often 16) based on corners or edges |
| Terrain mode | Biome-to-biome transition tiles |
| Corridor mode | Road/river path as alpha overlay (+ optional terrain underlay) |
| Material | Named texture source (one or more PNG tiles + transform/color) |
| Stack / transition | Ordered 1→N materials and the blend between them |
| Variant | One tile shape in the current scheme |
| Zone | Clickable preview region toggling a neighbor edge |
| Seed | Randomization key for texture/noise picks |
| Relief | Shading from relative material heights |
| Bitmask code | Neighbor pattern encoded into filenames / labels |